


How to Snowshoe: The Basics
A number of years ago, someone asked Executive Editor Tim Jones why he didn’t write a book on snowshoes and snowshoeing technique. He said it would be the world’s shortest book: “Attach snowshoes to feet, place one foot in front of other until destination is reached.” Or something like that. Of course he was being a bit facetious. There’s more to snowshoeing than that. But getting started with snowshoes, especially on packed trails, IS that easy. You really DO just put on a pair of snowshoes and place one foot in front of the other until you get where you want to go.
Don’t believe me? Late February and all of March are prime time for snowshoeing. Go to any cross-country ski area, rent snowshoes, and try it out on their groomed trails. Or, if you can borrow a pair of modern snowshoes that fit you, go for a stroll on a snowmobile trail. You’ll see what wemean. Easy, simple, fun.
How to Snowshoe: Advanced Lessons
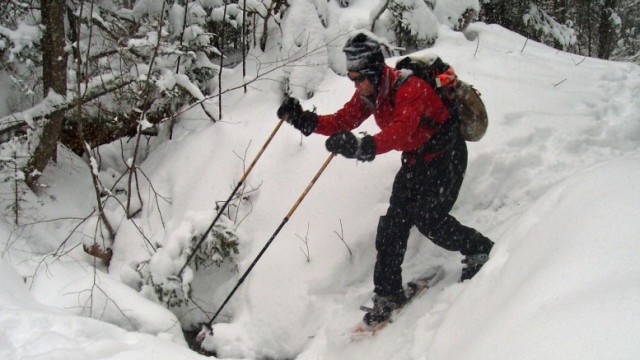
It’s when the snow isn’t packed or tracked, especially when it gets deep and soft or very crusty that snowshoeing gets to be more challenging. And if you tackle the deep, untracked snow or hard crust and add in a steep slope, plus a heavy backpack, it can get very interesting and challenging indeed. In any of those conditions, you quickly learn some tricks of advanced snowshoe technique.
First tricks for untracked powder or a breakable crust over powder: if you are alone, take it slow and easy, especially if you have a long way to go. No matter how big your snowshoes are, you sink deep into soft snow, and breaking trail is a lot of work. If you are in a group, take turns breaking trail. The temptation will be to let the strongest among you break trail all the time. Instead, spread the effort so everyone contributes according to their ability. It gives everyone a chance to find out what they can do. Even if they only lead for a few feet, they’ll learn something (and have a better appreciation for what the person in the lead is doing!).
A very thick, hard crust can make snowshoeing very easy—or very hard. It depends. A crust thick enough to support you lets you go anywhere you want to go. Great fun. But on steeper terrain, it can get tricky. Most modern snowshoes have traction crampons underneath—every snowshoe brand is slightly different. Learning how to efficiently dig those cleats into hard snow takes some practice. We recommend starting out on something short, steep and open, where a slip and subsequent slide won’t send you careening into danger (nylon outer clothes make a great sled on hard snow!)
Many newer “backcountry” snowshoes have flip-up heel risers on the bindings which makes it easier to stay comfortable and balanced when climbing steep hills, and makes it easier to really dig in your heel crampons. Nice touch. Really reduces lower leg fatigue on long climbs.
Sidehilling, or traveling across a slope rather than straight up and down it, can be tough on an unbreakable crust. Some snowshoes have bindings that allow your foot to remain straighter up and down while the snowshoe deck tilts to the angle of the slope. Without this feature, your ankles are going to get awfully tired. Sometimes, on really steep hills and icy hills it’s necessary to face up the hill and step crabwise across the slope to keep from slipping.
But snowshoes are fun and will get you to places of beauty you could never reach any other way.
How to Snowshoe: Obstacles 101

The most common obstacles in backcountry snowshoeing are brook crossings. Even little ones can be interesting, because the banks are often steep with a lot of snow piled on them.
Here’s the best advice we can give:
1) Ease yourself down the bank to the edge of the flow, using your poles to prevent you from sliding into the water. Stop there and reconnoiter. Plan your crossing step by step before you start.
2) Reach out and plant both poles on either side of the next point you are going to step to, whether that’s all the way across a tiny runlet or to a stable rock part way across a larger stream.
3) After the poles are firmly set, take your step. Repeat this until you reach the other side.
4) Plant both poles solidly and use them to help you up the bank.
The other obstacle you often encounter on backcountry trails are downed trees. You have three choices when it comes to trees—over, under or around. Around is almost always the best and safest option—though it sometimes means backtracking. Sometimes, however, there’s just no way around.
In the days of wooden snowshoes, you had to be careful going over fallen trees and branches, If you put the tip of your snowshoe on the tree and put your weight on it with the middle unsupported, you could snap your snowshoe in half—and you were in deep trouble. So you always made sure to step your foot solidly up onto any tree or rock you had to cross. That’s a good practice, even with “unbreakable” modern snowshoes, because the crampons will dig in and keep you from slipping.
Going under a fallen tree is a last resort. Trying to crawl though deep snow with snowshoes and a pack is no fun! Go around or over if you can.
[…] sake, let’s divide traction aids into two general categories: creepers and crampons. Most modern snowshoes have traction cleats built in, too, but that’s a subject for another […]